Overview
The Data Mapper is a web-based user interface specifically designed to simplify the process of creating data mappings.
Features
- Visual Mapping: The UI enables users to visually map fields from the source to the target data models. This intuitive feature makes it easier to understand and manage complex mappings.
- Support for Multiple Formats: The UI supports mapping for a variety of data formats including XML, JSON, and Java objects. Users can easily drag and drop fields between these different formats.
- Transformation Functions: The user interface provides a range of built-in transformation functions like Concatenate, Split, and Convert, which can be applied to fields during the mapping process.
- Preview: Users can preview the results of their data mappings before applying them, allowing for adjustments to be made if necessary.
The Data Mapper is designed to make data mapping more accessible and efficient, catering to both simple and complex data integration tasks.
Guide to Use the Data Mapper UI
Below is the data mapper UI snapshot with sample data:
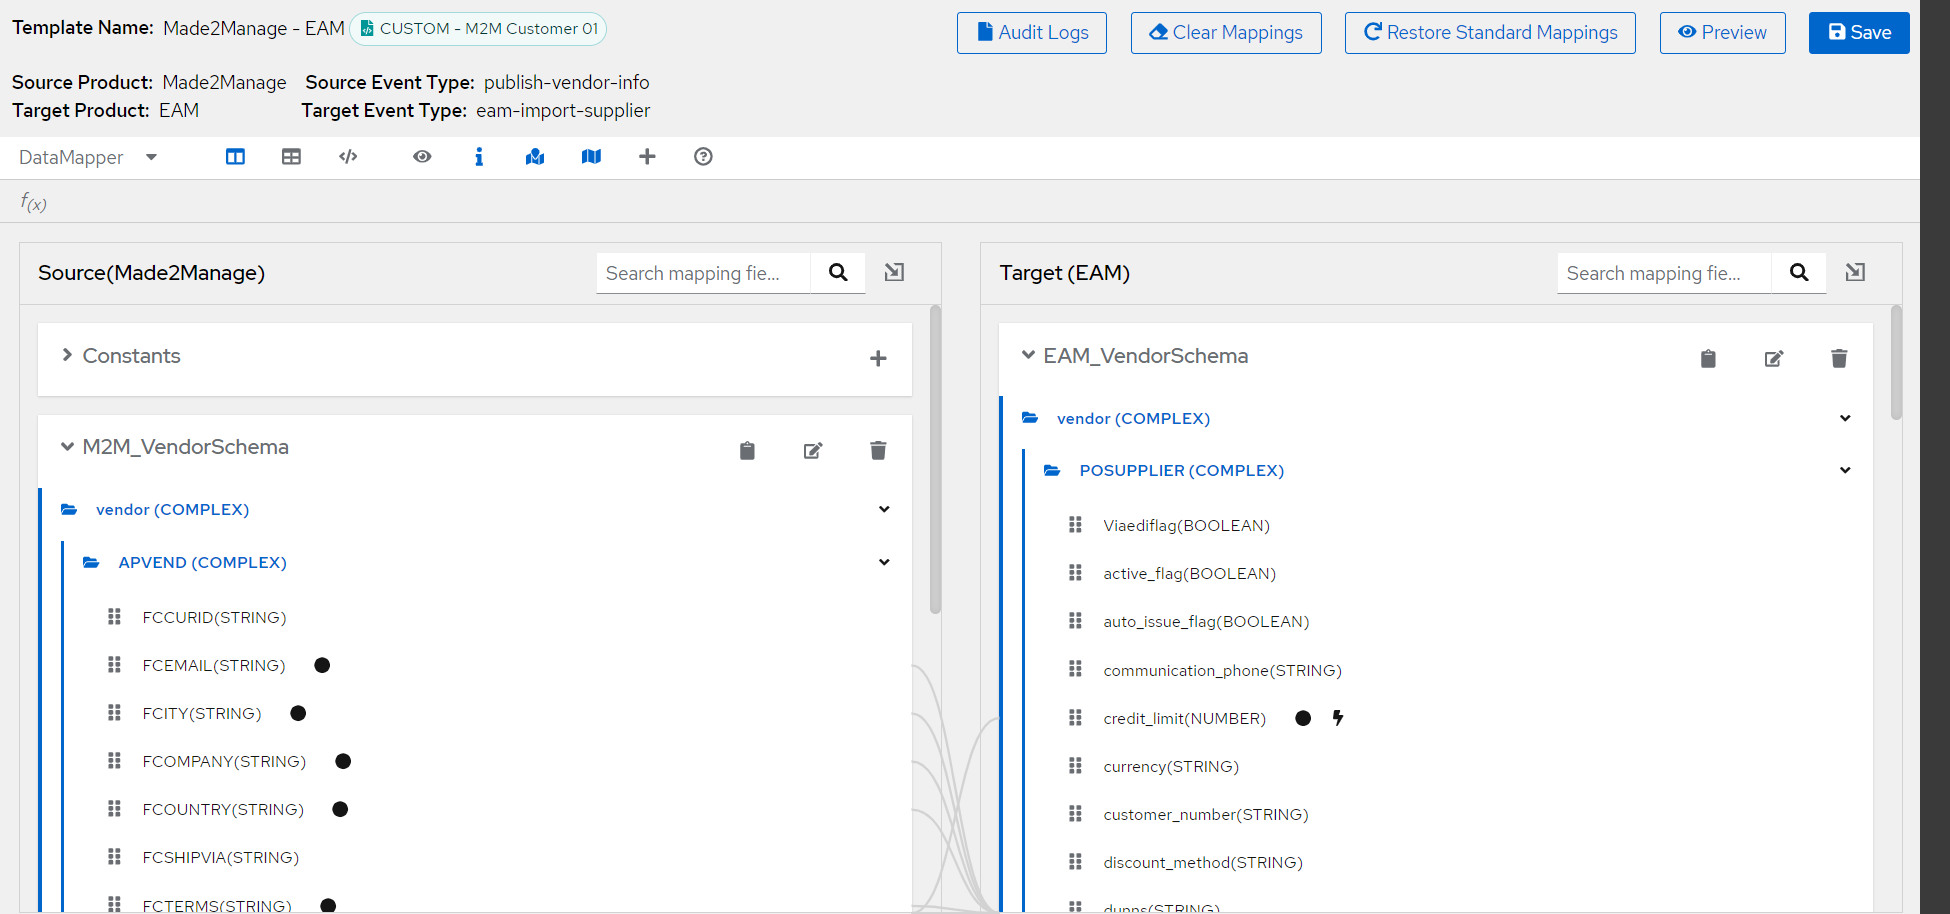
Lets go through each of the components one by one.
Template Info
The top left section of the UI gives the information about the mapping template. Template name , type of template (Custom / Standard) , tenant name and other relevant information for the template loaded in the UI.

Field mappings
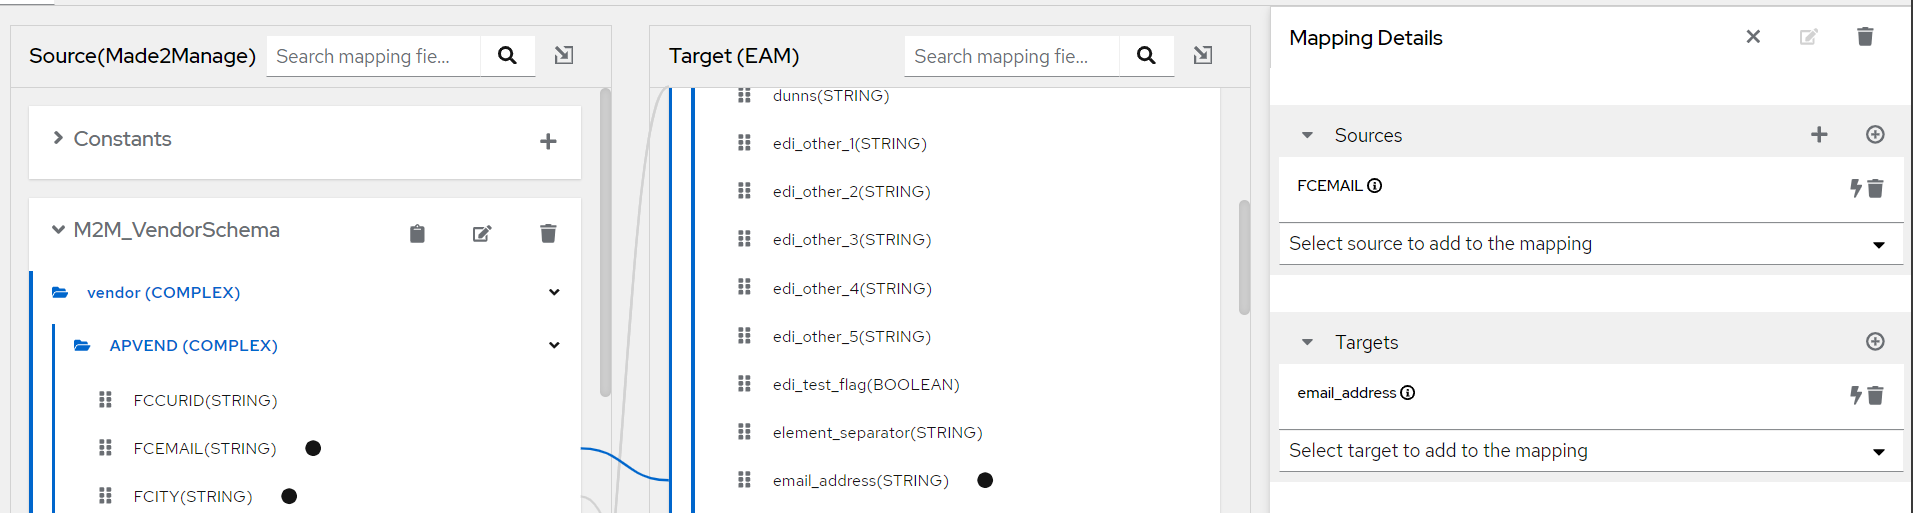
Drag the source field to the target field you want to map to - this will create a link / connection between the fields in the UI.
Multiple source fields can be mapped to a target field and we can define the functions that can be applied to those fields like concatenate, split etc.
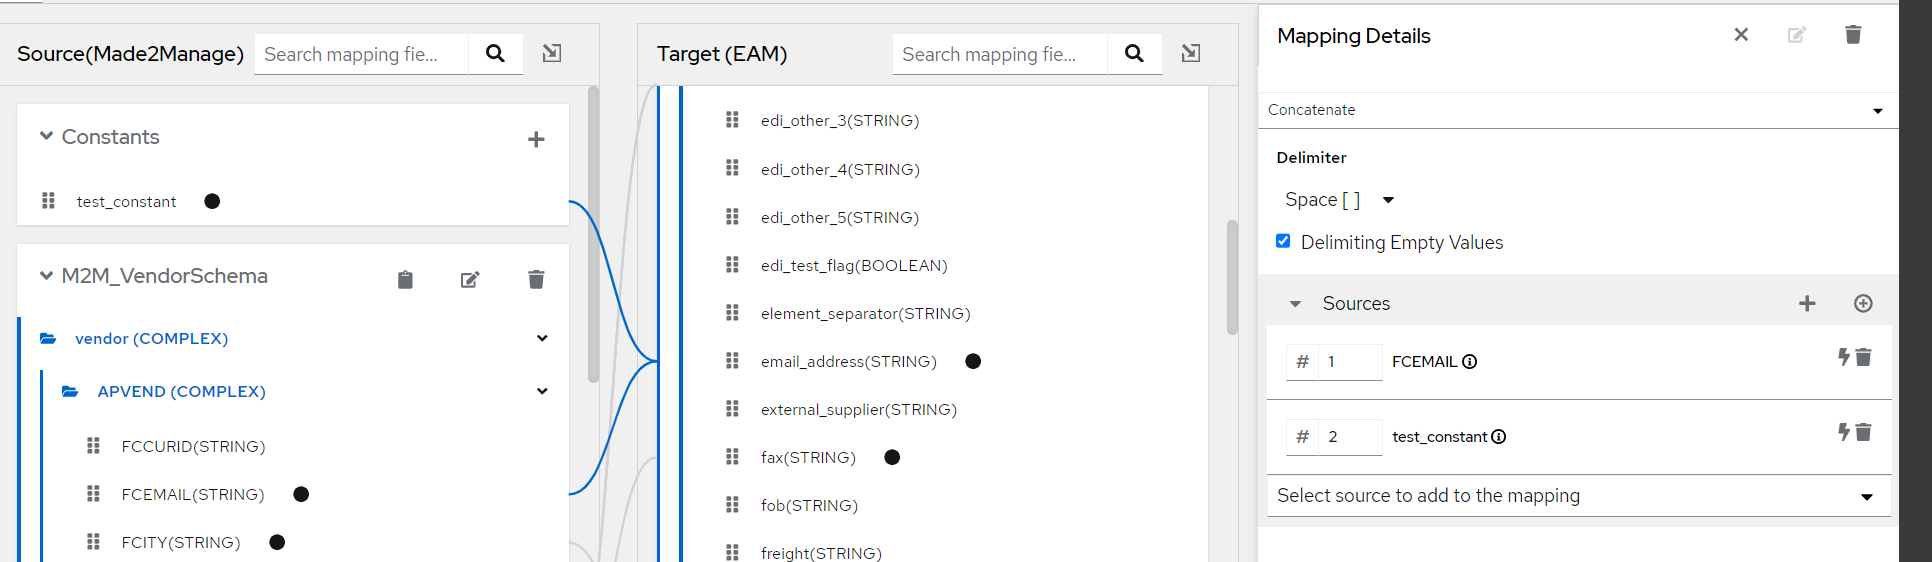
Adding Constants
Constants are a way to define a fixed value that can be mapped to a target field. These are particularly useful when you need a specific value to be assigned to a target field regardless of the source data.
Here's how you can use constants in data mapper:
- Creating a Constant: You can create a constant by clicking on the Constants panel. Click the + button, enter the value of the constant, and hit Enter. The constant will then appear in the Constants panel.
-334d72c8-5437-47af-94b0-1cddc015d893.png)
Or click on the + button in the source mapping details section
-2cf123a0-d42c-4cd6-94cb-02e9bada614c.png)
- Mapping a Constant: To map a constant to a target field, you simply drag the constant from the Constants panel and drop it onto the target field in the Target panel. The mapped constant will then always be assigned to that target field, regardless of the source data.
- Deleting a Constant: If you need to remove a constant, you can do so by selecting the delete next to the constant in the Constants panel.
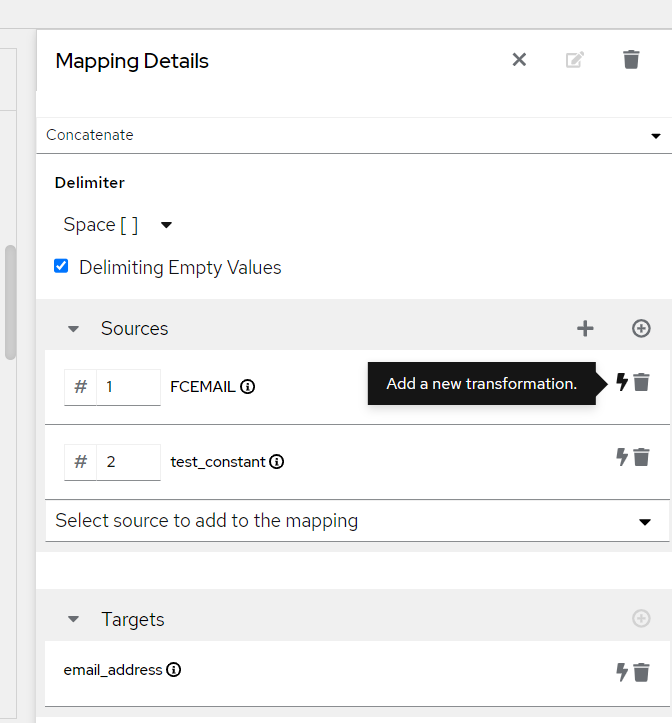
Adding transformations
You can add transformations to your field mappings to manipulate the data being mapped. Here's a general step-by-step guide on how to add a new transformation:
-
Open mapping details: In the UI, first select the mapping you want to add a transformation to. This can be done by clicking on the link between source and target field or click on 'show mapping details' option beside the field.
-
Add a New Transformation: Click on the Add Transformation button. This will open a dropdown menu with a list of available transformations.
- Choose the Transformation: From the dropdown menu, choose the transformation you want to add. The available transformations will depend on the type of field you selected and may include functions like Concatenate, Split, Convert, append etc.
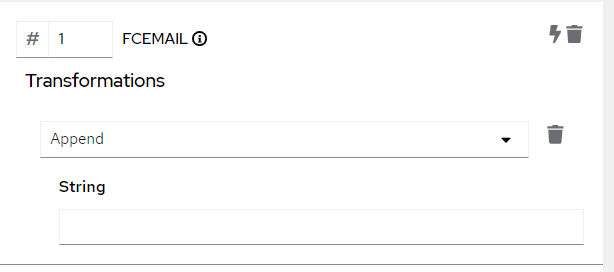
- Configure the Transformation: Once you've chosen a transformation, you may need to configure it by providing additional information or parameters. For example, if you chose a 'append' transformation, you might need to specify the string to append to the field.
Preview field mapping and transformation
The preview feature is a useful tool that lets you see the results of your data mappings before you apply them.
To enable preview click on the eye button present above constants section in the UI.
-aff91449-800e-46a1-bd1d-85fae1f074dd.png)
Now you can see the mapping and results preview for a selected transformation:
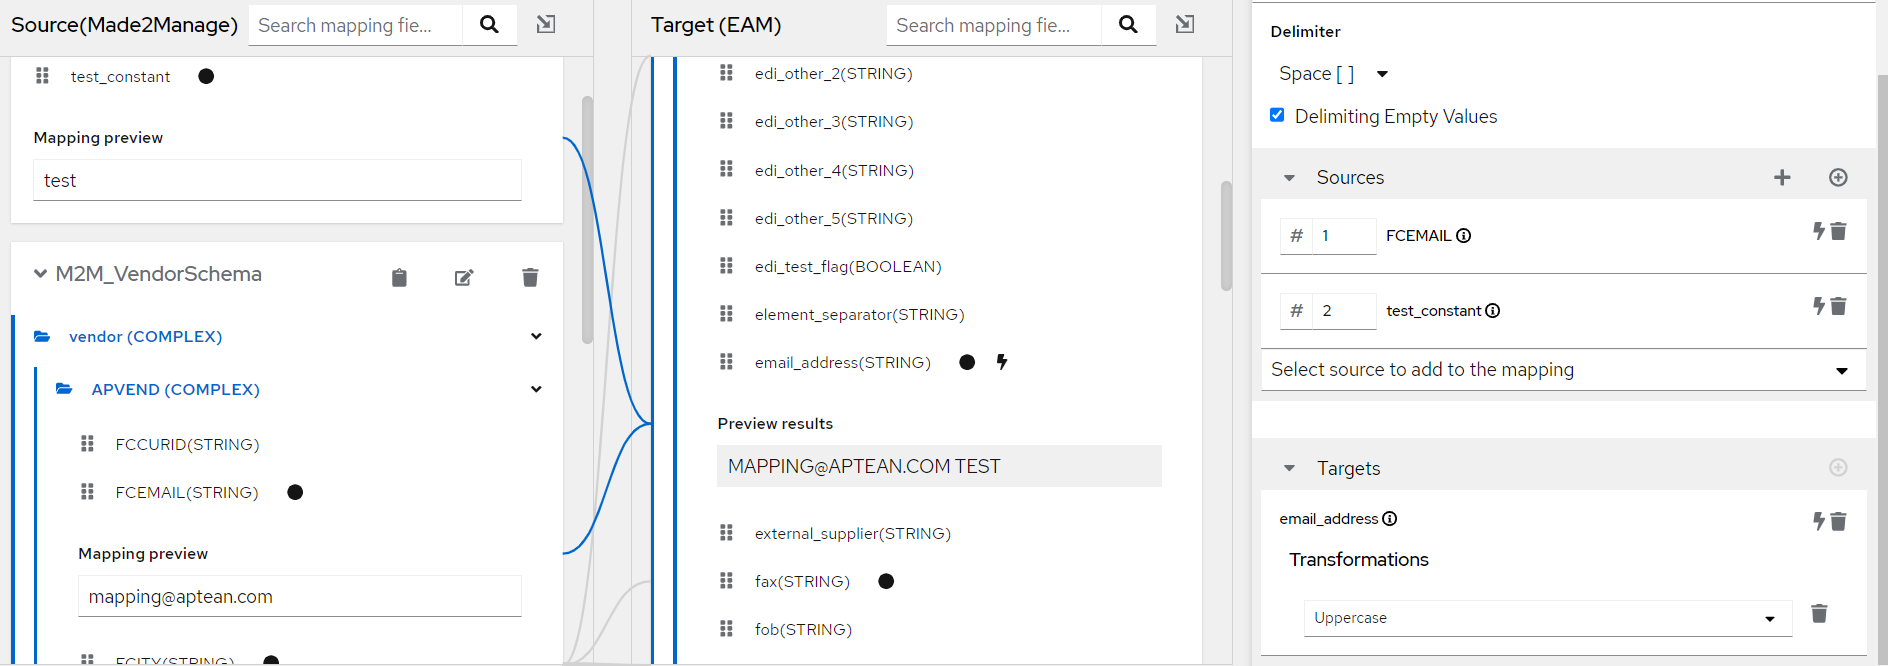
For example, above the value provided in the source field along with the constant will get transformed to uppercase and the result preview is shown.
If the previewed results aren't what you expected or wanted, you can go back and adjust your mapping accordingly. Once you've made changes, you can preview the results again to ensure they're correct before applying the mapping.
Mapping validation : warnings and errors
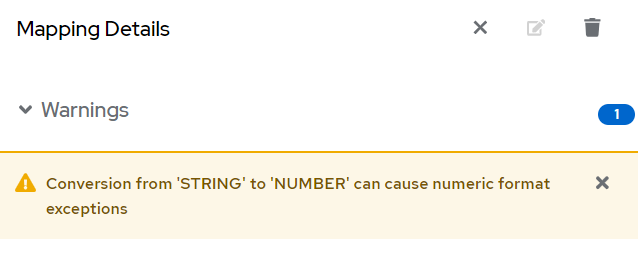
Mapping details section also shows warnings and potential errors in the mapping. For example, In above case the STRING type field is mapped to NUMBER type field , so it is showing some warning.
Conditional Mappings
Conditional mapping in data mapper allows you to dictate the conditions under which specific mappings will be applied. This can be particularly useful when the same input field needs to be mapped to different output fields based on certain conditions.
To create a conditional mapping, select the f(x) symbol.
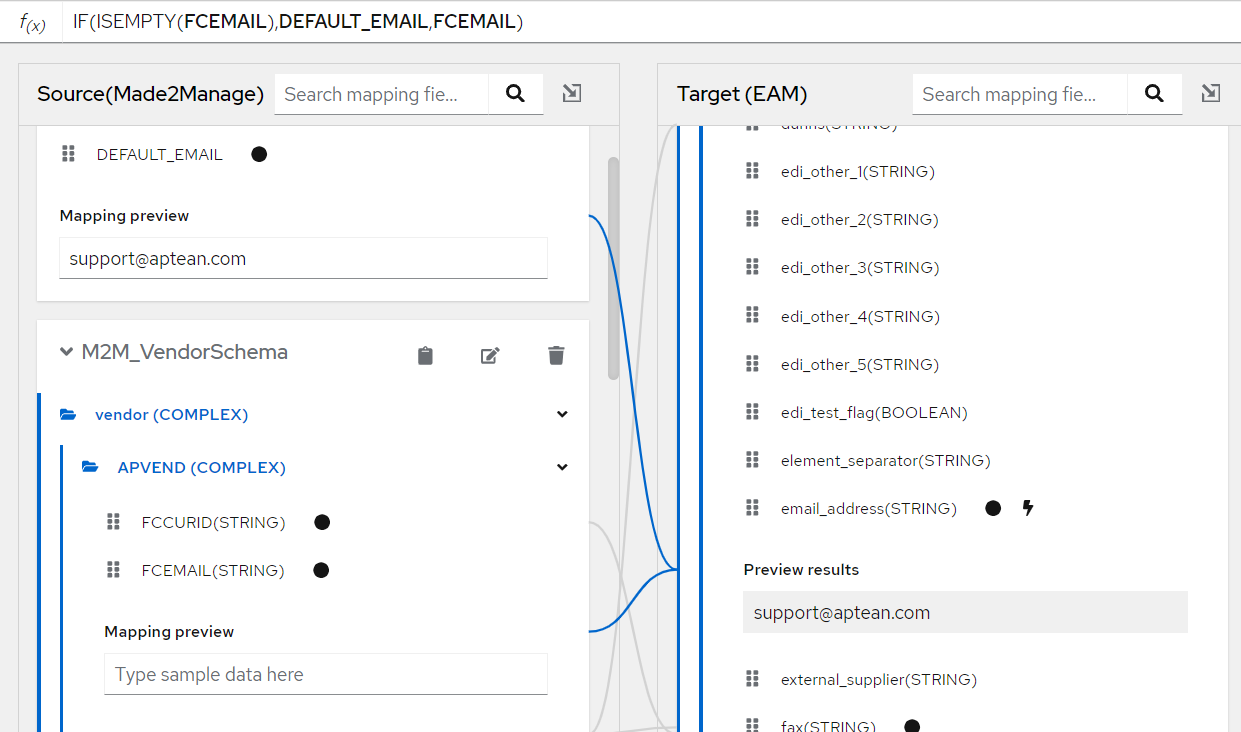
For example, Above we have created a conditional mapping using an expression : IF(ISEMPTY(FCEMAIL),DEFAULT_EMAIL,FCEMAIL) which means if the FCEMAIL source field is empty it will take the DEFAULT_EMAIL constant else it will take FCEMAIL.
Transforming Source or Target Data
In the Mapping Details panel, under Sources or under Targets, in the box for the field that we want to transform, click Add a new Transformation flash icon to the left of the trash can icon.
On the top, among the icon, click on eye icon to view the mapping preview for the specified field.
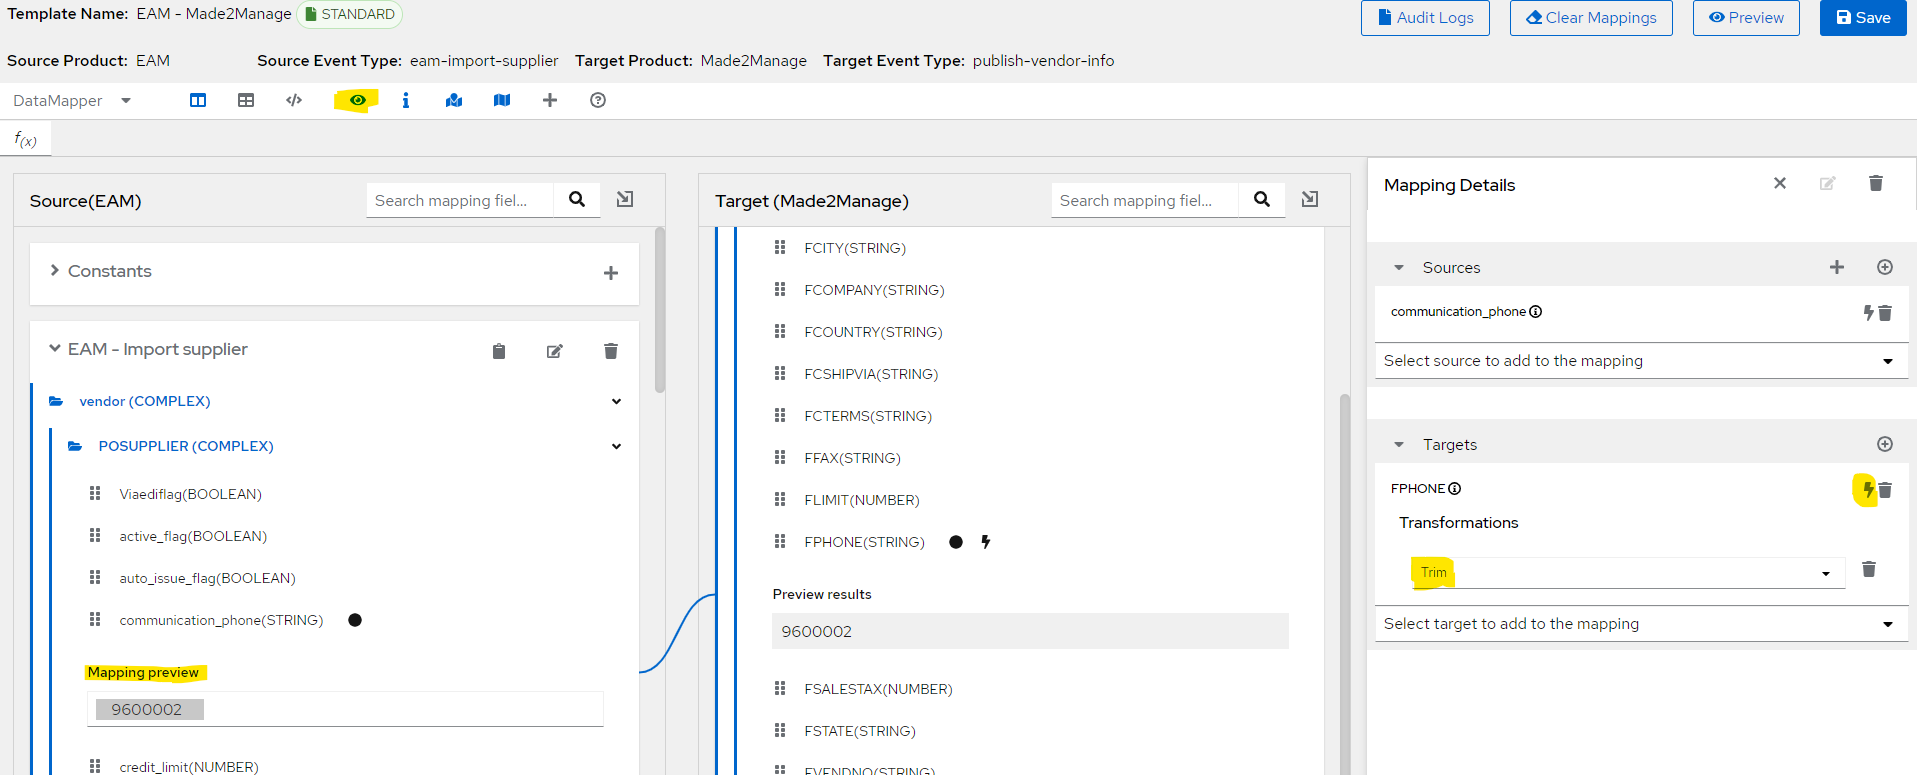
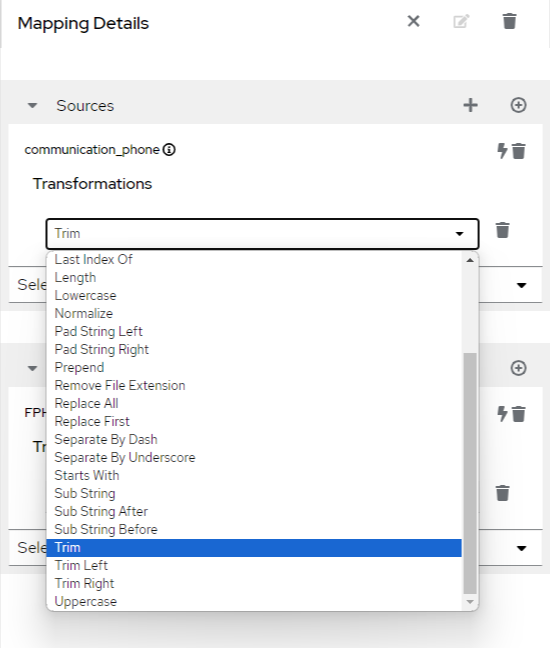
Scroll down in the drop down option to see the Sub String, trim, trim left, etc options.
For more details, refer to Apache AtlasMap - Transforming Source or Target Data
Audit logs
On top right section of the UI, there is an option to view audit logs. This provides the information of the CRUD operations performed by users on the templates.
-527c010b-08cb-412c-87aa-7a508fcde037.png)
Clear and restore mappings
In the same section as above , we have options to :
- Clear mappings: Clear the existing mappings done in the UI.
- Restore standard mappings: Restore the standard mapping for the tenant.
Preview Data transformation
You can preview the overall transformation of your data by clicking on the preview option. Enter you sample data and click on test. On the right section you will see the transformation response.
-ab216b1e-4ae8-4f33-9b41-b5195c1f6aa3.png)
To know more about DataMapper features and limitations visit : https://www.atlasmap.io/
Lookup config
This solution outlines the process for value replacement during data transformation. When transforming data from a source product to a target product, certain fields may need their values substituted based on a predefined lookup table.
Overview
The source product has a field called sourceField with possible values [v1, v2, v3, v4]. The target product requires these values to be translated to [p1, p2, p3, p4]. This translation is facilitated using a lookup table defined with key-value pairs: [v1-p1, v2-p2, v3-p3, v4-p4]. During data transformation, value substitution is performed according to this lookup table.
Lookup Table Definition
Lookup values will be stored in the data transformation configuration as JSON. This feature is only available if custom or standard mapping is available. A user interface to update the lookup metadata will be added to the Data Mapper screen.
JSON Example
Below is an example of the JSON structure that defines the lookup table:
{
  "targetFields": [
    {
      "name": "detail.field1",
      "lookup": [
        {
          "value": "val1",
          "replacement": "repl1"
        }
      ]
    },
    {
      "name": "header.field1",
      "lookup": [
        {
          "value": "code1",
          "replacement": "codeA"
        },
        {
          "value": "code2",
          "replacement": "codeB"
        }
      ]
    }
  ]
}
JSON Schema
The JSON schema for the lookup table is defined as follows:
{
  "$schema": "http://json-schema.org/draft-07/schema#",
  "type": "object",
  "properties": {
    "targetFields": {
      "type": "array",
      "items": {
        "type": "object",
        "properties": {
          "name": {
            "type": "string"
          },
          "lookup": {
            "type": "array",
            "items": {
              "type": "object",
              "properties": {
                "value": {
                  "type": "string"
                },
                "replacement": {
                  "type": "string"
                }
              },
              "required": ["value", "replacement"]
            }
          }
        },
        "required": ["name", "lookup"]
      }
    }
  },
  "required": ["targetFields"]
}
The lookup config can be added for a mapping from the datamapper UI screen.
